Geo Pro Camper 400w Solar Upgrade – Lithium Batteries on Geo Pro 19fbs
The Rockwood Geo Pro Camper comes with 100w of solar from the factory. The Geo Pro and E Pro trailer lineup are some of the best and cheapest travel trailers that are setup too boondock. The Geo Pro lineup comes with a factory package of 100w, a 1000w inverter and AGM batteries.
The dealer you purchase the trailer from is who decides what batteries will be installed. We have seen people on Facebook groups talk about how they only received 1 – 80amp hour AGM battery while other’s received 2 – 100amp hour AGM batteries. Before you purchase your trailer ask your dealer if they can install 2 batteries at no additional charge! It will help a-lot when it comes time to boondocking and being able to last a night in the cold.
If you plan on doing some serious boondocking and long road trips we recommend upgrading to Lithium Batteries. We upgraded to two Lion Energy UT1300 batteries for full-time living. We boon-docked for 8 days straight in our Geo Pro 19fbs without ever running out of power in Buena Vista Colorado.
Click Here – SAVE 15% OFF ALL LION ENERGY PRODUCTS – Code 7k at checkout
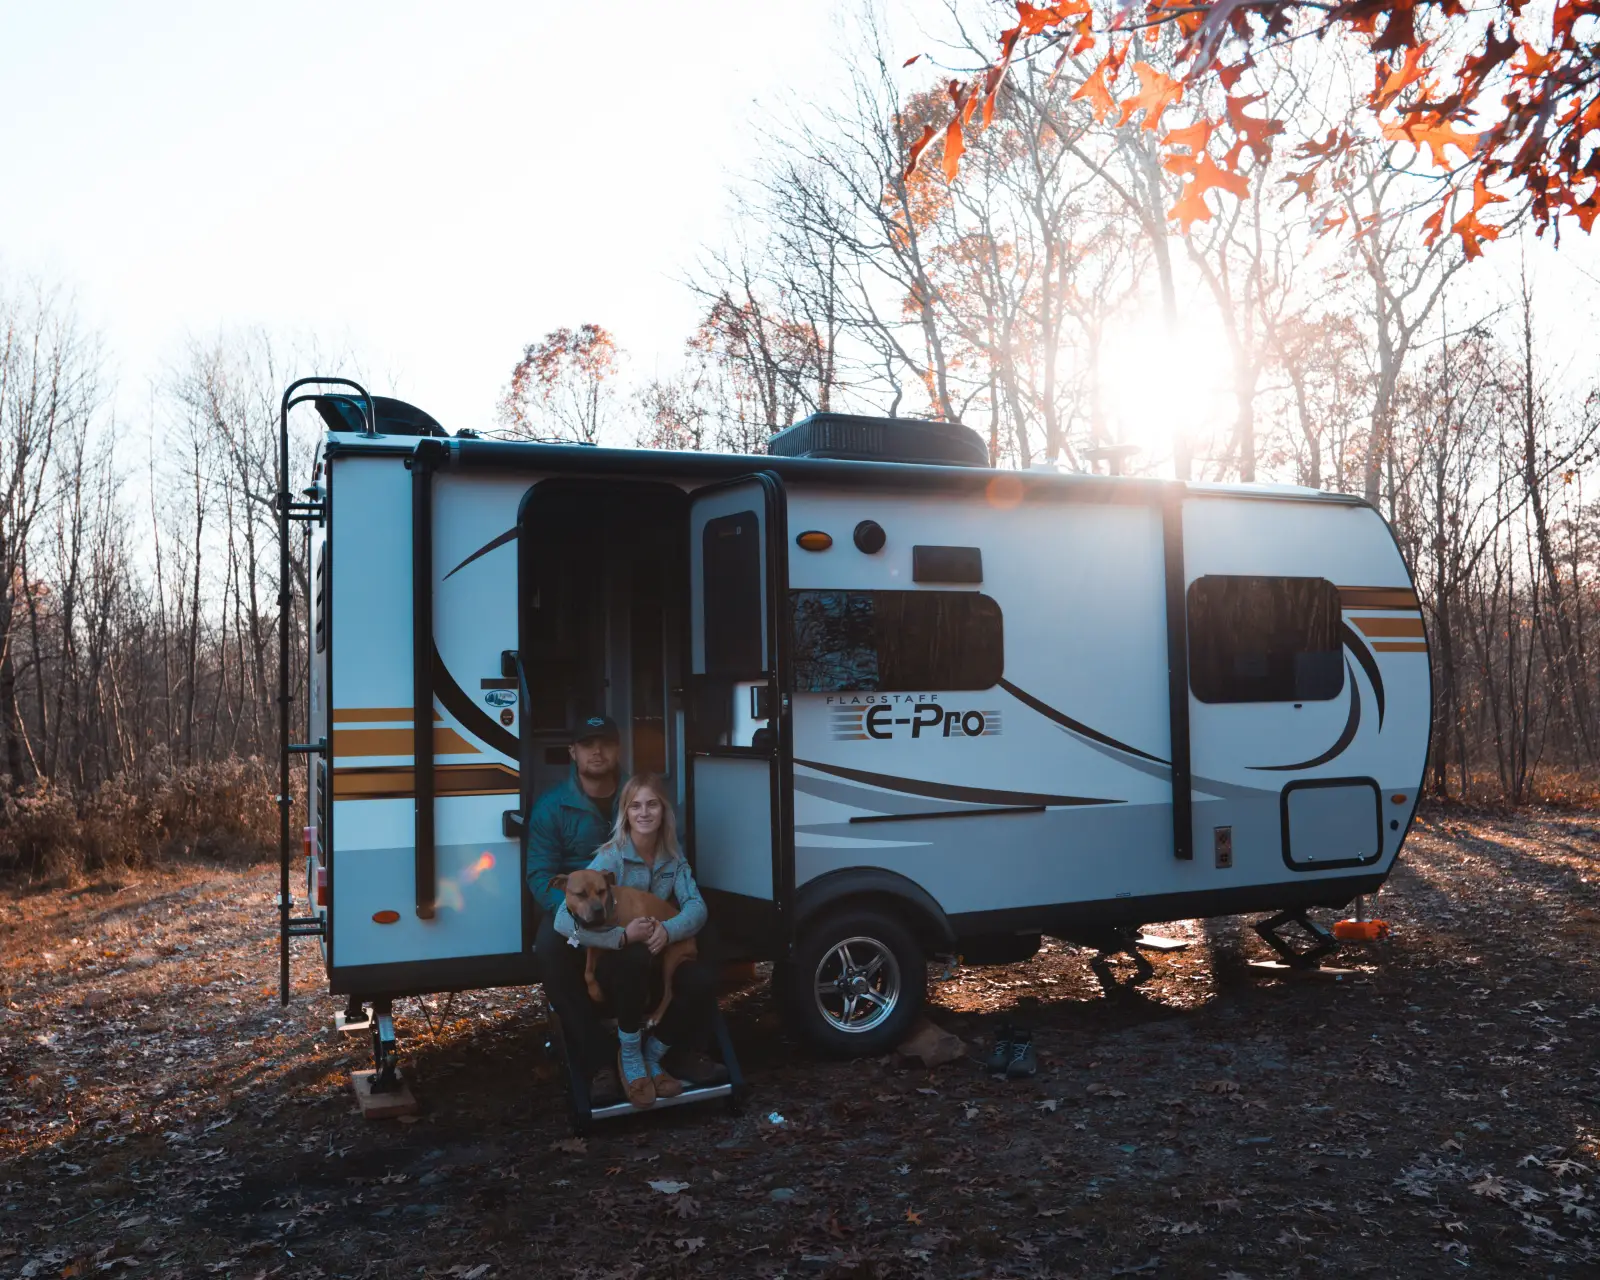
Solar Panel Upgrade/Addition – Why you need more solar power
If you have never owned a trailer with solar power before it’s hard to understand how it works. Before we purchased our 2020 Geo Pro 19fbs we had never owned a travel trailer. Our first night boondocking was in October in the mountains of Pennsylvania. We only stayed 2 nights but the temperature dropped to below 40 degrees both nights. We figured we would be able to run the propane heater all night, but learned that our solar and batteries could not handle it. Both nights we drained the batteries around 3am because we were not able to charge them enough from the factory solar during the day time.
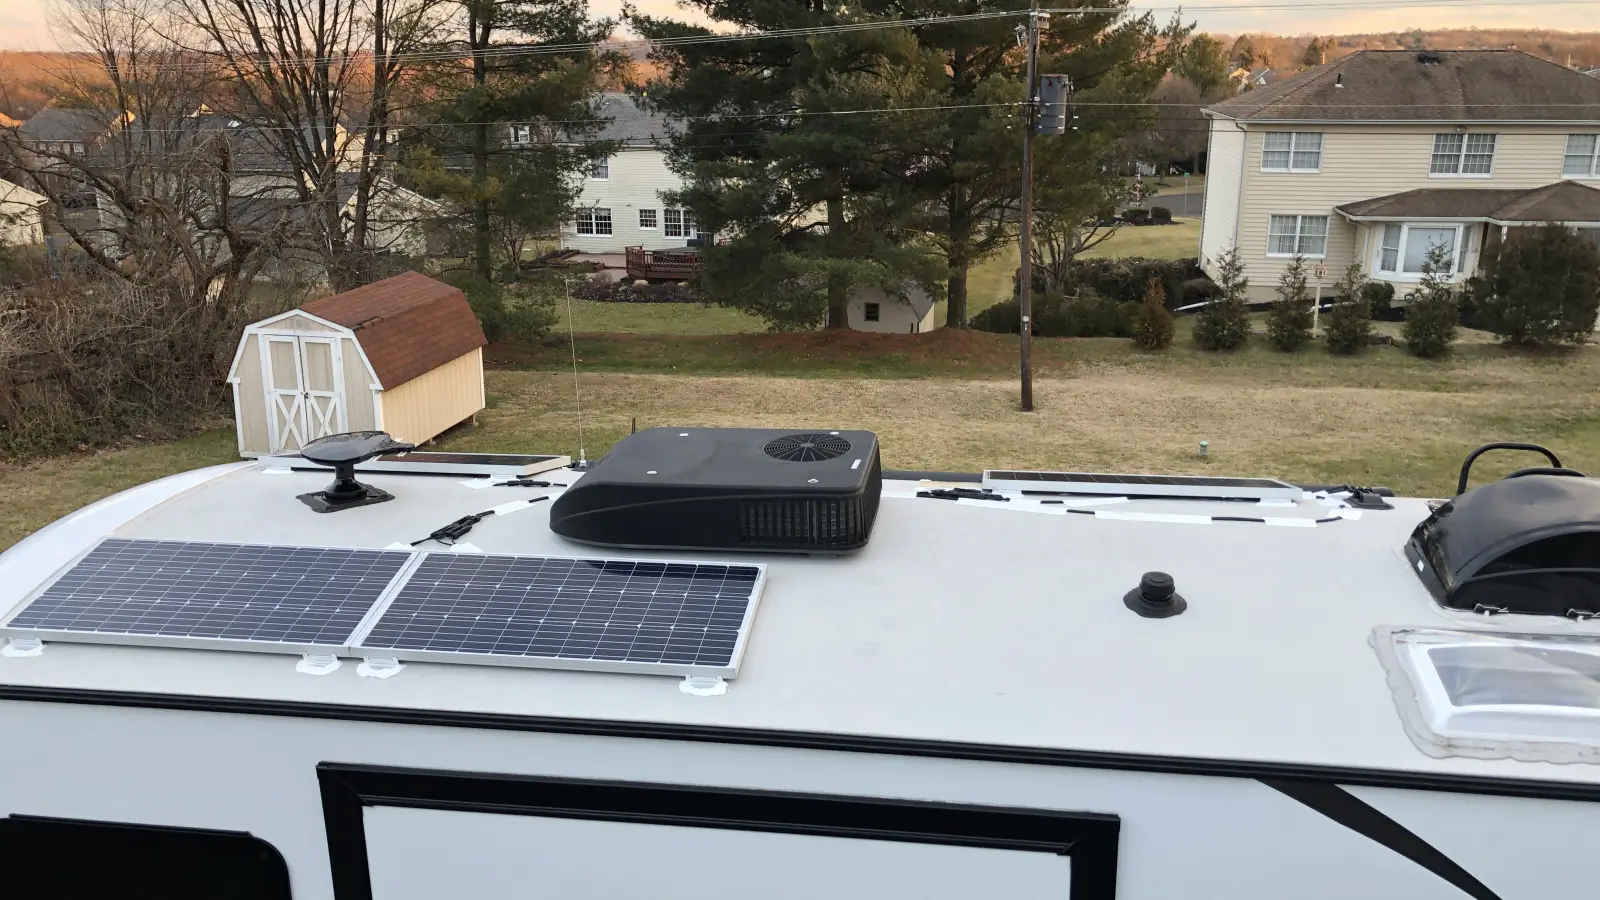
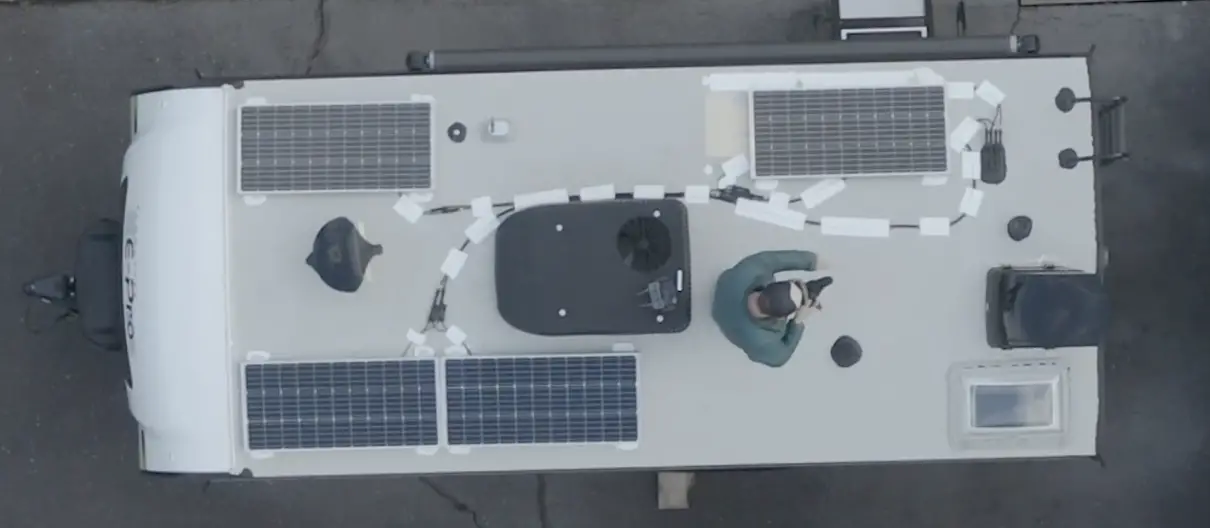
Both nights when we went to bed we only had around 40% of the battery capacity remaining. This was because our 100w solar panel was not able to fully charge out batteries during the day, even though it was sunny. On a bright sunny day our factory solar panel would bring in around 4-5 amps. This is not enough power alone to be able to charge both batteries to last a full night with the propane heater running. The picture below is of the final product (panels, wires, connectors and eternabond tape).
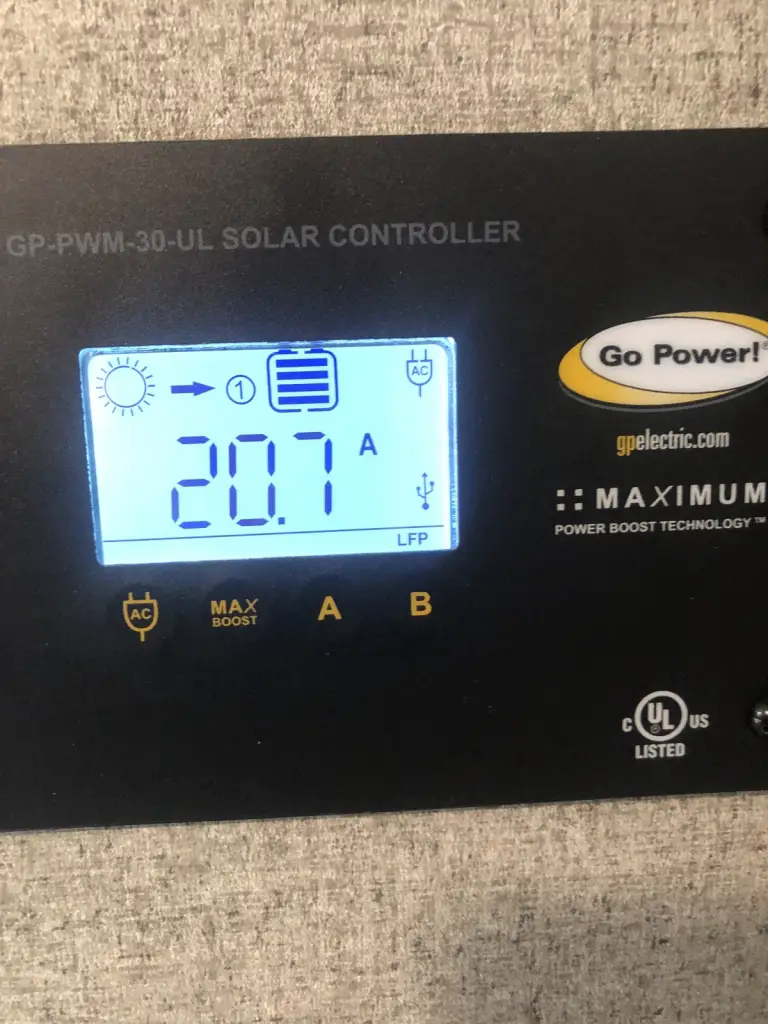
With the new 400w solar install you will be pulling in around 20-25 amps which is 5x the amount of the factory setup. We had plans to live out of our Geo Pro full-time which is why we knew we needed to upgrade our entire system.
If you dont want panels mounted in the roof of your trailer, consider portable solar panels for camping!
Parts List – 400w Solar Upgrade on Geo Pro 19fbs
- Renogy 100w Solar Panels – (Need 4)
- 5ft 10AWG Cables – (Need 4)
- 15ft 10AWG Cables – (Need 2)
- MC4 Connectors – (Need 3)
- EternaBond
- Mounting Hardware
- Dicor Self Leveling
- Lion Energy UT1300 Batteries
Tools Needed to Install the Solar Panels & Wires
- Black Marker
- Impact Gun or Drill Gun
- Razor Blade
- Caulk Gun
- Screwdriver
- Socket Set
400w Solar Panels on Geo Pro – Watch My Video Install
Preparation for Installing Solar – Geo Pro Trailer
Before you continue with the install make sure your RV roof has no leaks or weak spots in the roof. Also turn off the battery disconnect switch and even consider removing your batteries all together. This should not be a problem for the new Geo Pro campers but some older models might have developed a small leak over the years. A wet or dilapidated roof will not be able to hold the panels on without flying off the roof, so make sure your RV roof is in good condition first.
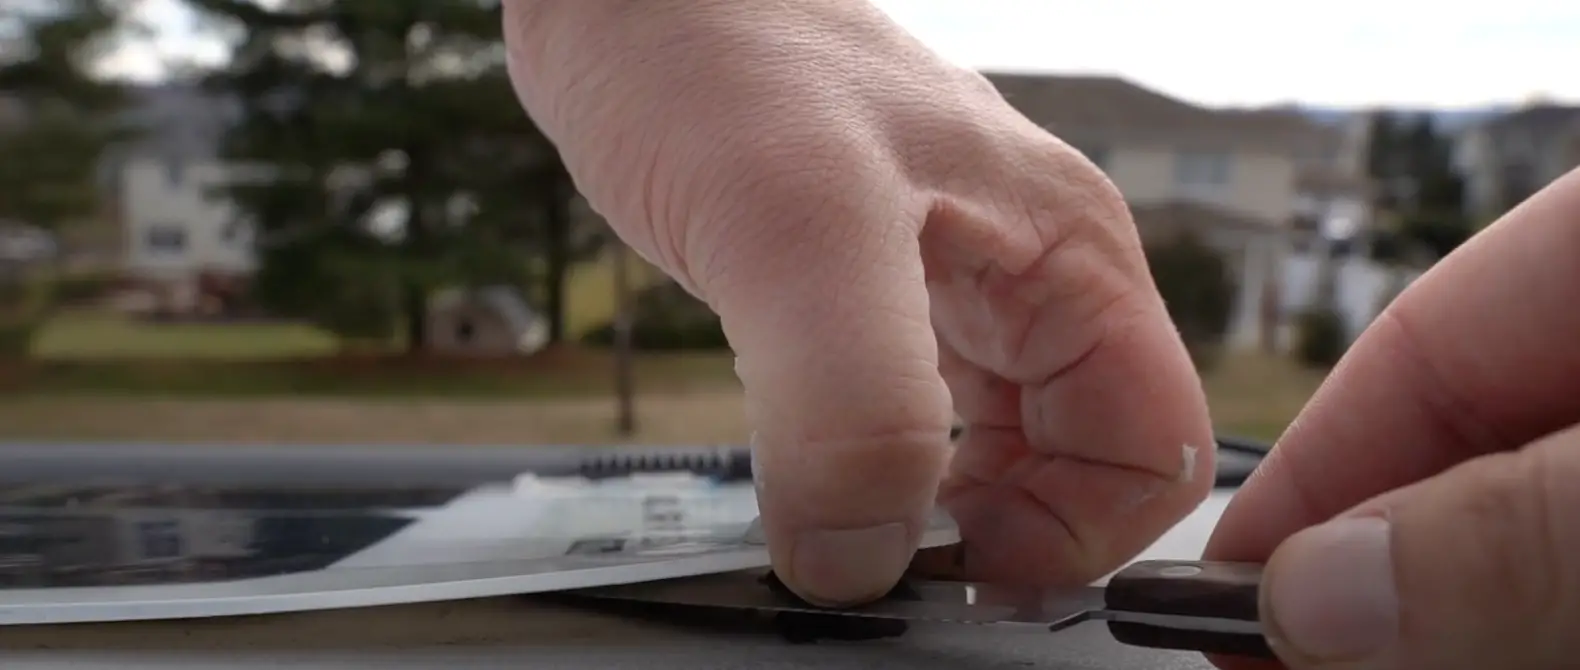
I recommend removing the factory 100w solar panel UNLESS you are going to be adding more 100w Go Power solar panels. Go Power is the manufacturer of the factory solar panel, and you could actually loose amperage and solar efficiency by mixing and matching different brand panels. I decided to add 4 – rigid 100w Renogy Solar Panels because they last longer, are more efficient and were the same price. I used a Phillips head screwdriver to remove 6 screws and then cut the adhesive material with a normal kitchen knife.
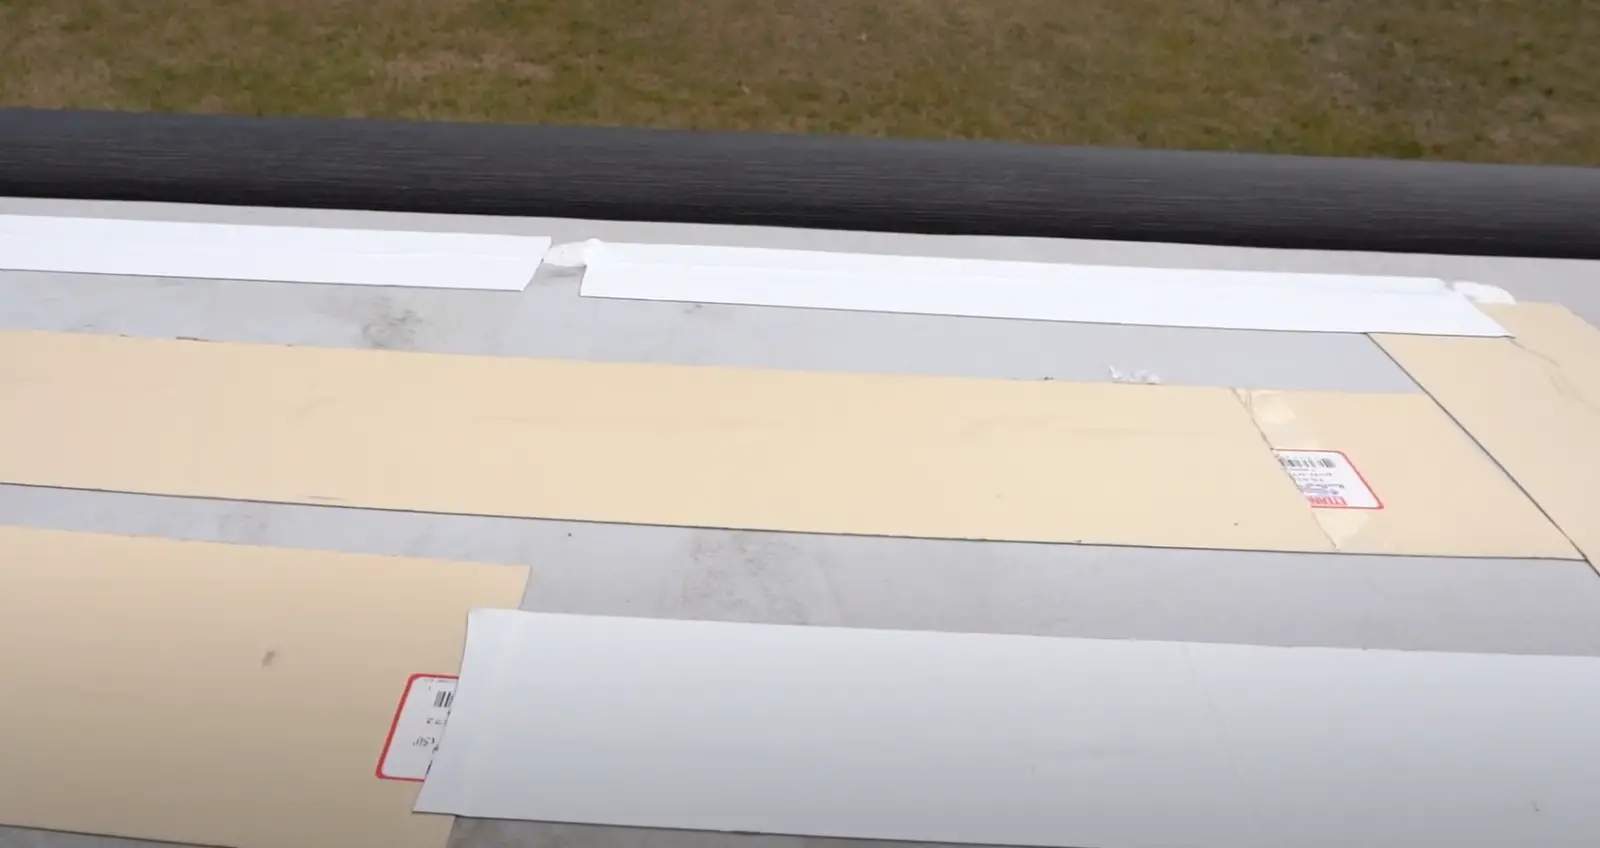
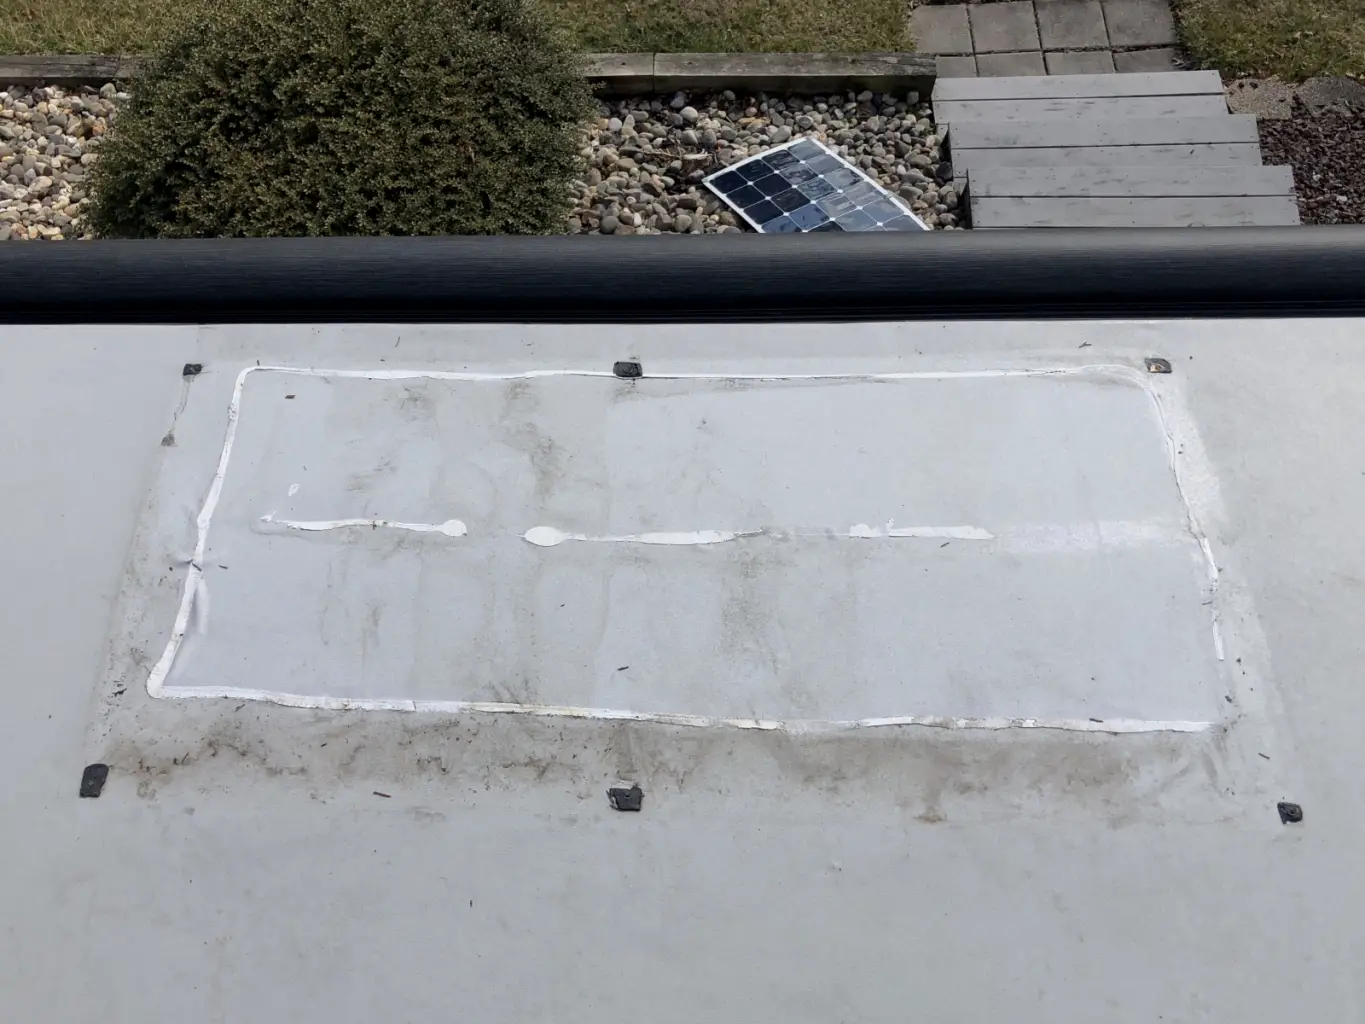
The picture below is from after I removed the factory solar panel. I placed Eternabond Tape onto of the existing adhesive points the factory used to prevent future leaks. When it cut and peeled back the original solar panel the Geo Pro’s rubber roof started to peel up from the wood underneath. I also noticed in one or two spots the rubber roof actually ripped which is why I felt the need to apply Eternabond to everywhere that the original panel was attached too.
Ignore the different color Eternabond as I didn’t have enough white to finish to the job!
Step 1 – Lay out the Solar Panels on Geo Pro Roof
Before you do anything it is important to make sure the Solar Panels will fit on your model Geo Pro or travel trailer. Bring all of them up onto the roof and test fit them without drilling any holes. Make sure they all fit how you want and see if you can leave some extra room on your roof for Kayaks or more panels in the future. Once you drill into the roof of your RV there is no going back, so make sure your panels are good to go before installing.
The Geo Pro campers have a rubber roof which is why you need to drill into the roof to secure the solar panels. I would have preferred to not drill in the roof, but I had to. Fiberglass and Aluminum roofs are the only RV roof material that you can use 3m tape on to secure the panels. If you have a fiberglass roof I would recommend to use VHB tape which requires no drilling. You simply place the double sided tape in the bottom of the mounting hardware and attach it directly to the RV roof.
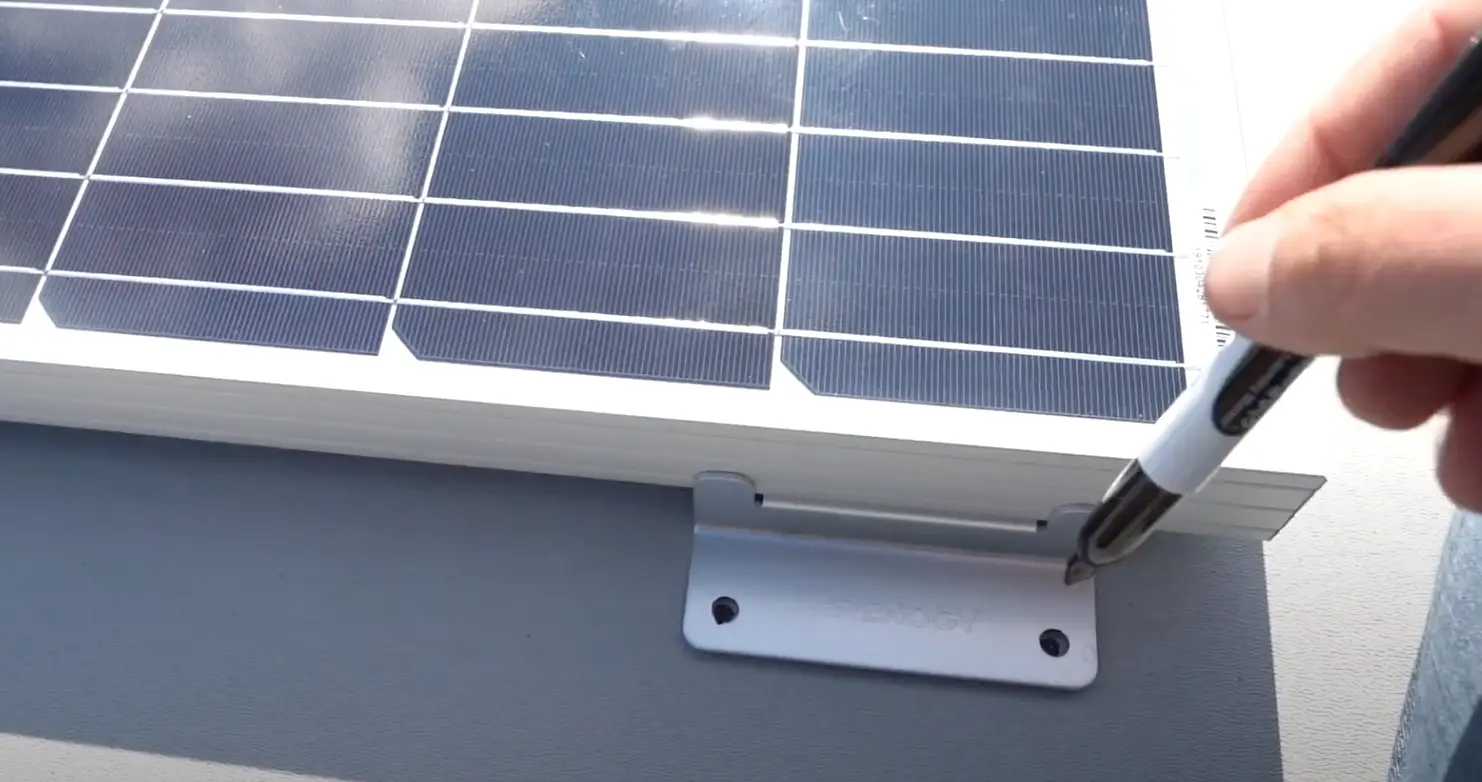
As I described in the install video above, use a black marker to mark your drill holes before you actually drill. I placed the solar panel with the mounting brackets installed, onto the roof. I then marked all 8 holes with a black sharpie, and then removed the panels. This left 8 black dots on the roof where I needed to drill to then attach 1 Renogy Solar panel.
I would also recommend putting some dicor on-top of the black marks so that the underside of the mounting bracket is protected from water. Once you mount the solar panels, it is very difficult to get dicor underneath and behind the panel. 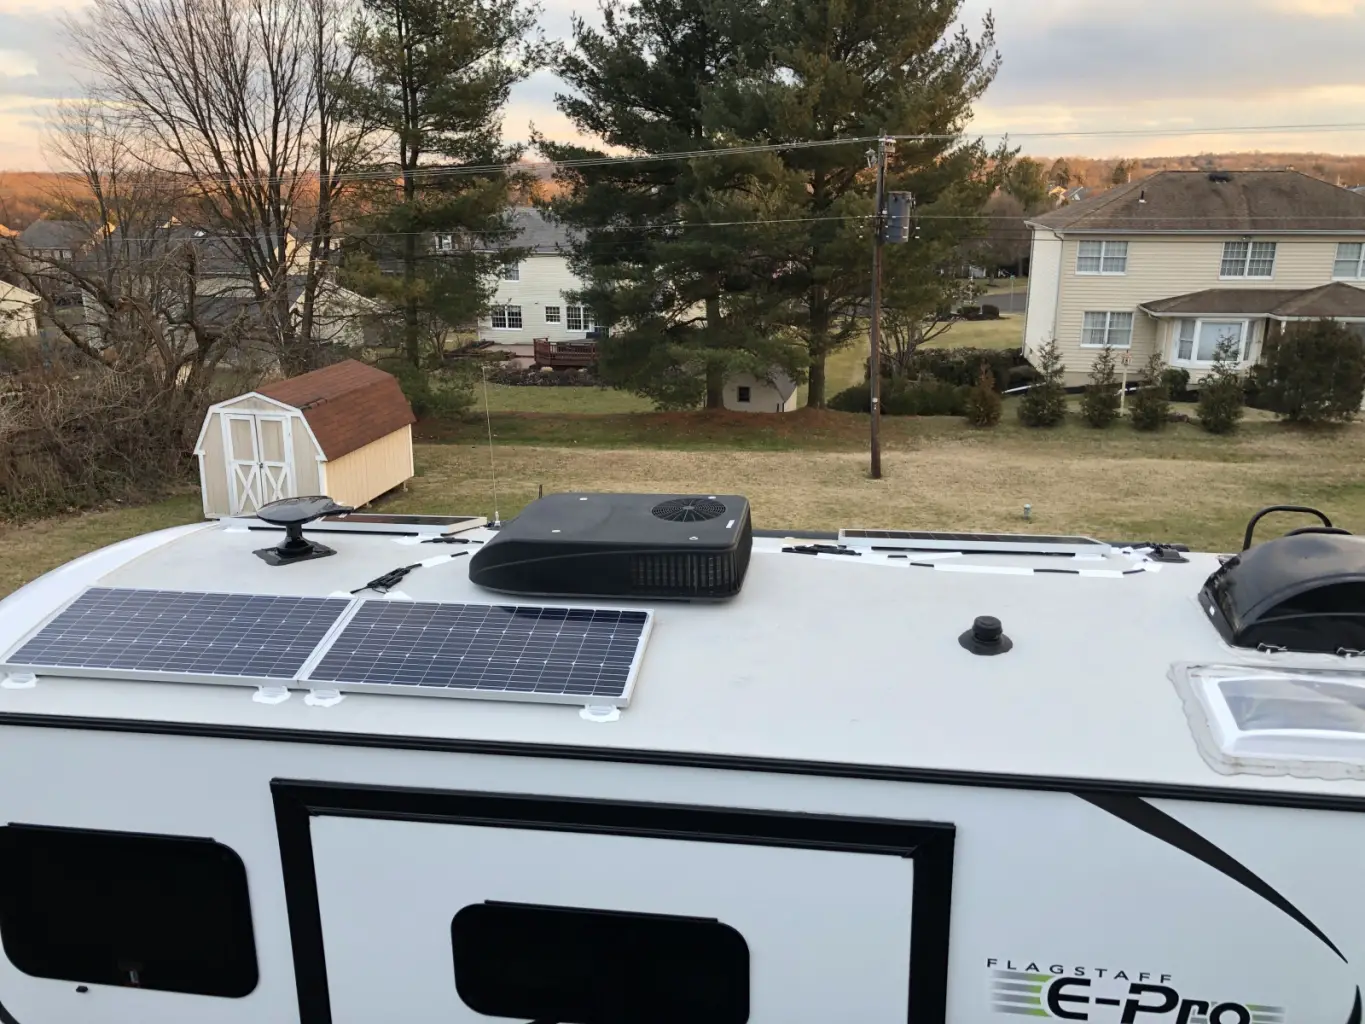
Step 2 – Drilling & Putting Dicor on top of the Screws
The WORST PART of the install, is having to drill into you brand new RV roof. This is what I thought for weeks when I ordered all the parts I needed for the install. I wanted to avoid drilling into my roof at all costs!
Its really not that bad and after 6 months of having these solar panel’s on my roof we have no leaks! Once you mark where the panels are going and put down a small amount of dicor it’s time to screw the panels down to the roof. Use the mounting hardware that I listed above and everything will go smoothly.
I removed the factory 100w solar panel…BUT you DONT have to do this. You could easily keep the factory solar panel and just add 3 renogy solar panels, but it could reduce your amperage and cause problems. I AM NOT a solar expert, but I read a lot of articles and watched a lot of videos before I did the install. The common theme was that you should not use different solar panels as it could actually reduce your amps that you are bringing in from the sun due to the different voltage of each panel.
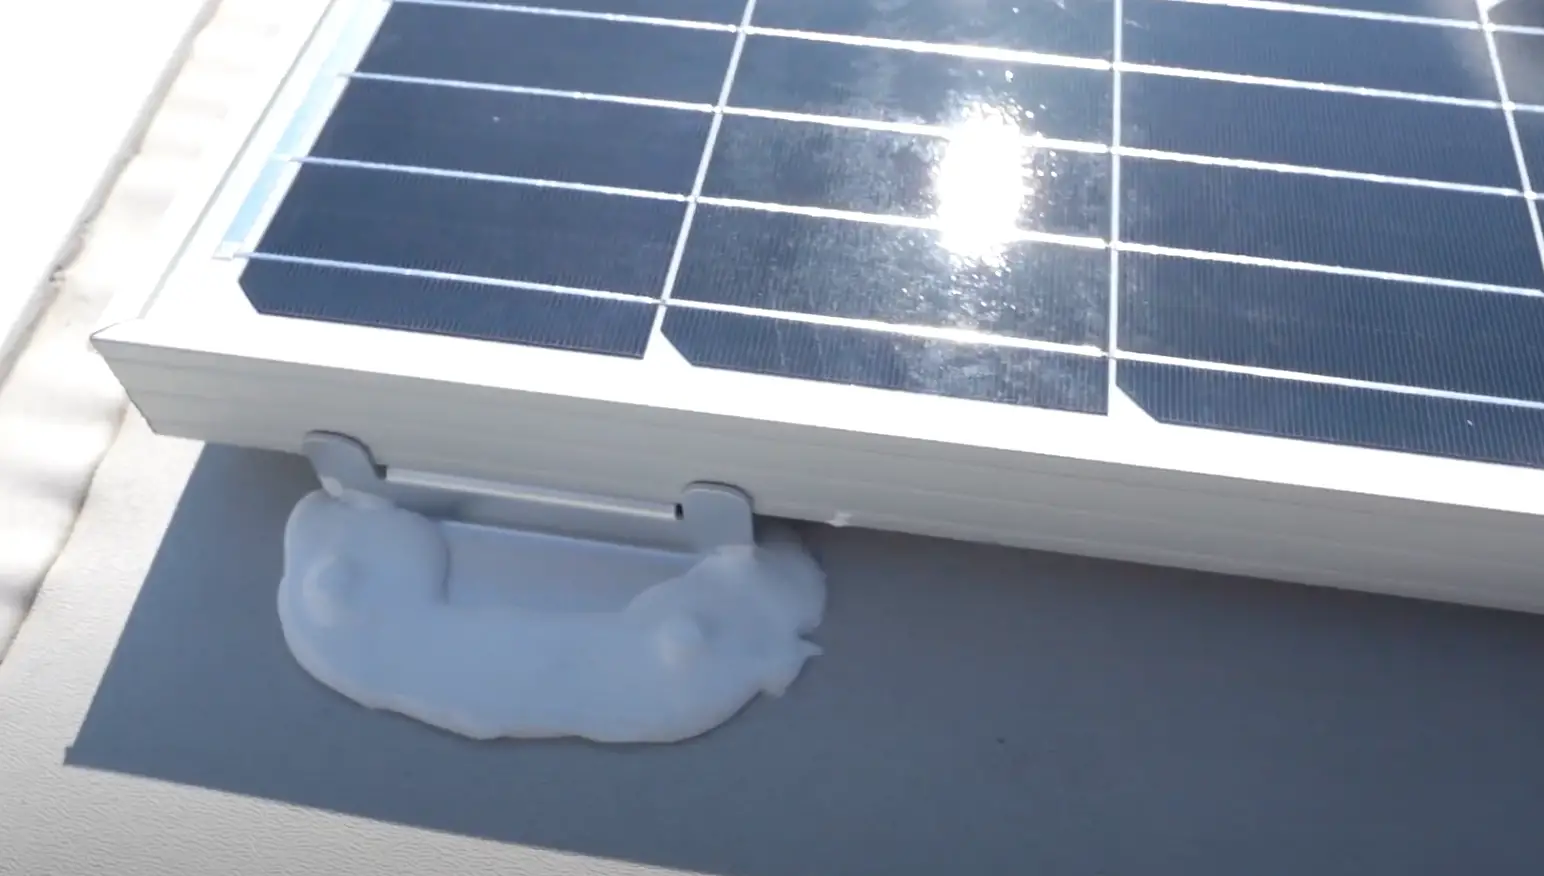
Place the Solar Panel mounting feet on-top of the black marks and dicor that you put on the roof. Once the Solar Panel is square and in the right spot, screw the provided screws into the roof. The dicor underneath the mounting brackets will get pulled down from the screw so that the roof is water proof. After you screw down all 8 screws its time to place more dicor ontop of the screws to prevent any water damage.
Make sure you cover the screw heads with dicor and get the sides and back of the mounting brackets as best as you can. Dont put on a huge glob of it because it will run down the roof if you put in too much as it does take a few hours to fully dry.
I made a mistake when installing my solar panels, and did the wiring almost immediately after. It wasn’t a huge mistake, but the wiring kept touching the wet dicor and smearing it on top of the roof of our Geo Pro camper. I would recommend to wait a few hours or to wait until the next day before you start to route the wiring!
Step 3 – Wiring Solar Panels on Geo Pro Camper
The easiest and final step of the install! Be sure that you have eternabond tape to secure the wires to the roof of the RV.
The first panels that you are going to wire together are the panels on the left or drivers side of the RV. Both of the “junction” boxes on these solar panel should be facing each other. This means you can connect both panels to two MC4 connectors without needing longer wiring. Once you connect both panels to an MC4 connector run both 15 foot cables from the connectors to the cable entry factory cable entry gland. Dont hook it up yet, but run the wires over to the entry gland so that they are ready to be connected.
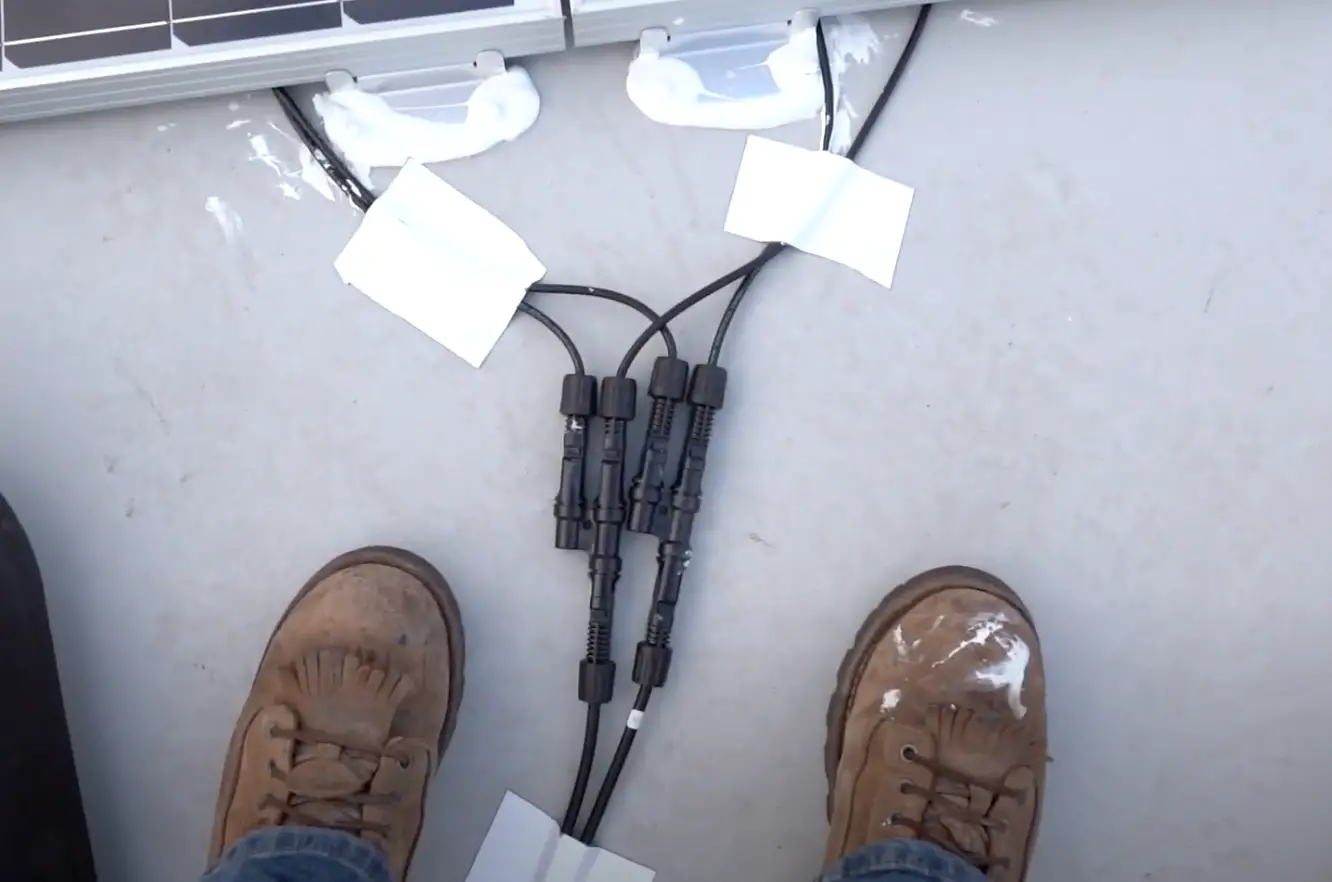
You are then going to have to wire both panels on the “door side” of the RV together with the 5ft cables. Attach two of the 5ft cables to the positive and negative cables on far front panel. Run those cables to the panel that is in the rear and attach them together with the provided MC4 connectors.
The picture below shows the rear solar panel and how it is connected to the front panel. The rear panel does not need extra cables length since the 5ft cables are running directly to it. Connect the MC4 connectors like the picture shows below and then run 2 more 5ft cables to the cable entry gland like you did with the 15ft cables.
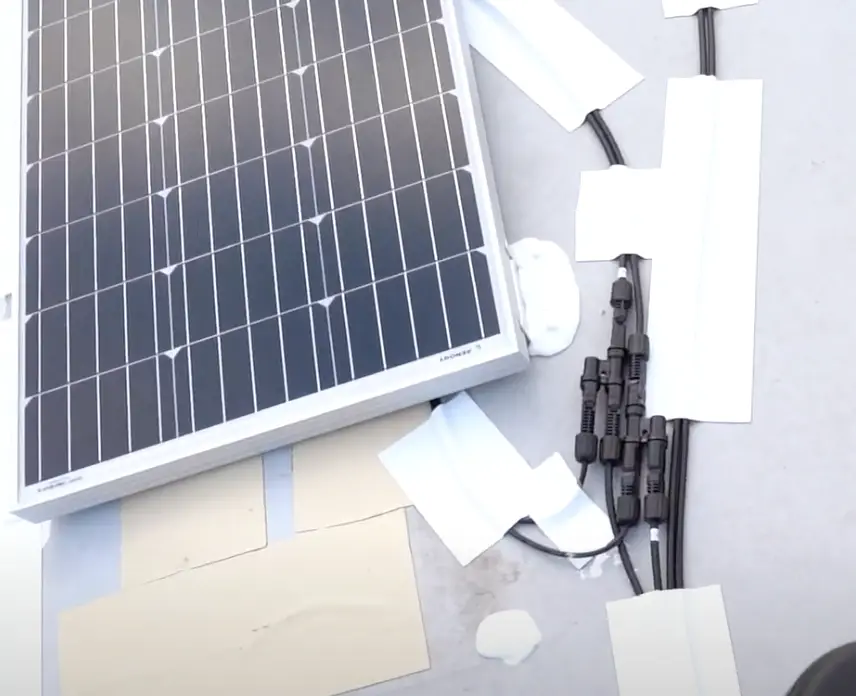
Once you run all the solar panel wiring on your Geo Pro to the cable entry gland (pictured below) you are ready for the final step! Depending on what model Geo Pro or E Pro camper you have your cable gland entry might be in a different location. The Geo Pro 19fbs entry gland is at the rear of the camper where the steps are.
Attach 2 – MC4 connectors to the cable entry gland entering the roof. There should now be 4 cables that you need to attach to the MC4 connectors coming from your solar panels. Attach positive to positive and then negative to negative. This means that the 15ft cables will go to different connectors and so will the 5ft cables. In the picture below of our Geo Pro 19fbs roof, you can see how the 2 pairs of cables that are on the roof together actually split to different connectors on the cable entry gland.
Once you are done connecting all the panels you can now re-install your batteries and turn on the battery disconnect switch. The solar panels should now effectively be charing your batteries which you can monitor with the factory solar charge controller inside your Geo Pro.
On a bright sunny day, I average anywhere from 20-25 amps with the new 400w solar setup. With the factory Go Power 100w panel I only would get up to 4.5 amps max, which means this setup is now 5x more productive than the factory setup!
Secure the Wires – Geo Pro Camper Solar Upgrade
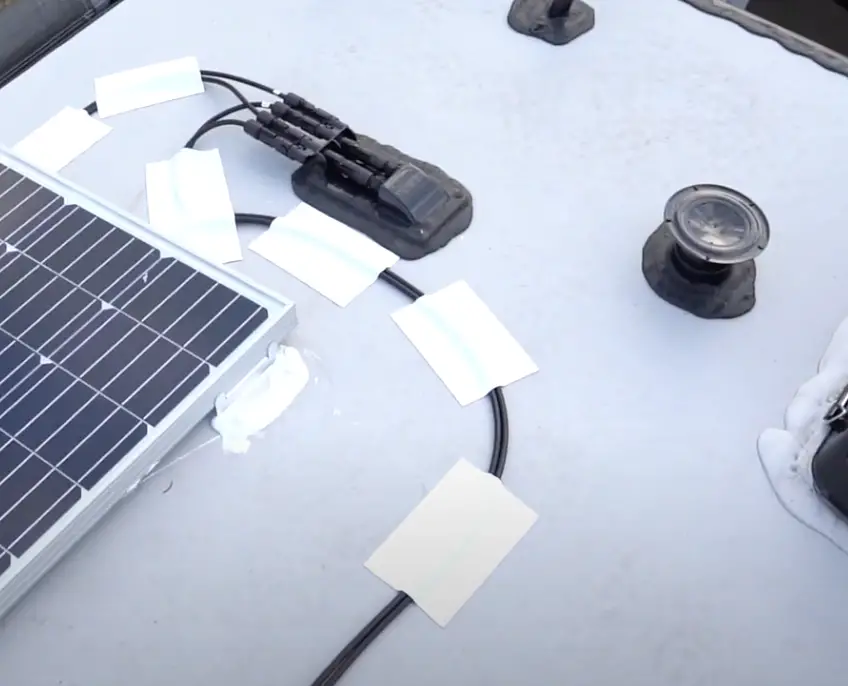
Now that everything is hooked up and you checked to make sure you are pulling in the proper amperage it is time to make things look nice on the roof. As I mentioned above in the parts list, be sure to buy eternabond tape to secure the wires to the roof without drilling.
The picture below gives a clear picture for how I laid out the panels and wired them all together. This picture is also a great reference to make sure you wired your solar panels together correctly. You can also see how I used eternabond tape every few inches to secure the wires from flying around on the roof.
Eternabond tape is very strong which is great, but make sure you are putting it down where you want because it is hard to peel back up and could rip the Geo Pro roof.
Geo Pro Camper Solar Review – 400w of Solar Panels
After 6 months of having the solar panels on the roof and 2 months of full-time travel we have had NO ISSUES! We had boondocked in Ohio for 8 days, South Dakota for 3 days and Nebraska for a few days as well. We never once ran out of Solar power but it is always a good idea to turn your inverter off when you are not using it, as it consumes a-lot of power.
For anyone looking to do a cross country road trip or a few week long trips throughout the year 400w of solar is the way to go. The total cost of the solar panels & materials was around $600 which is fairly cheep in my opinion.
If you are looking to upgrade you Geo Pro solar capabilities even more check out my Lithium Battery install. I routed my Lion Energy UT1300 batteries into the inside of my camper to protect from any thief’s and cold or hot weather. This Lion Energy batteries have been a huge upgrade compare to my factory batteries and last up to 25 years!
Click Here – SAVE 15% OFF ALL LION ENERGY PRODUCTS – Code 7k at checkout

 St Elmo to Tincup Trail – Offroad Trail near Buena Vista, Colorado

I am installing panels on my geo pro…. any special screw require d ? it seems like when you drill in, the screw has very little to bit into, must be some type of foam under the rubber membrane. I used 1 1/4 inch soft wood screw. Does not seem to have much hold down power..
I used that screws that came with the Renogy mounting brackets I included in the post. I agree, when I installed them the screws did not seem to have much bite to them. But with 8 screws holding down each panel I had traveled over 5000 miles and 6 months, and have never had any issues.
Solar panels are interesting. It saves electricity bills. I’ve been thinking of trying solar panels myself. Thanks for sharing.
Have a nice day.
Hi – question on your Geo Pro solar and the propane heating. What I understand from what you have written above, the heater draws down on your batteries?
“We only stayed 2 nights but the temperature dropped to below 40 degrees both nights. We figured we would be able to run the propane heater all night, but learned that our solar and batteries could not handle it.”
I’m new to RVing, so looking into all this and want to understand more of the Geo Pro’s setup. Are there components to the heating system, e.g., fans, that are powered by the electrical system that would then drain the batteries?
Thanks!
Yes the blower (fan) that literally “blows” out the heat runs off electric. This electric is your batteries, which is what drained my batteries. As I started, they were not fully charged before bed. I now have Lithium batteries and dont have any issue running the heater all night!